New Dinghy Cushions

With the tubes repaired, and the outboard repairs well undweray, the next major upgrade for the fishing dinghy was to replace the worn-out cushions. We’ve reupholstered most of our boats, so we had little concern that we could perform this job ourselves. So, with a rainy weekend forecast, we ordered zippers, naugahyde, and phifertex from sailrite, and also rented a couple movies from Redbox.

This was the dinghy condition before we started any of these ugpgrades. This photo gives a good idea of where the cushions will be installed, as well as the design.

After taking the cushions home, the complete extent of damage to the cushions became apparent:

After determining that nothing from the original cushions would be salvageable, we began the project by doing some test seams to figure out the best way to join the two colors of vinyl. We decided to go with a french seam with white top-stitching, and using the phifertex as the reinforcement fabric on the underside:

Three of the four cushions were simply oblong squares, a fairly easy cushion to build. After making the top panel out of two-colors of vinyl, the bottom panel was cut out of phifertex mesh to allow drainage, a zipper panel was built for one side, and finally the remaining three sides are also cut out. Then it’s just a matter of sewing all the parts together.

The 4th cushion, the seat back for the main seat, was much more complicated, with armrests and a boltrope. So it required deconstructing the existing cover to use each panel as a pattern on the new material.

Some of the details of the cushions include the phifertex mesh bottom for drainage, and the zipper panel:

The front-side panel stitched to the top panel:

And a closeup of the french seam:

At the end of the first day, the living room was a cushion construction disaster:

But at the end of the weekend, three of the four cushions were completely finished. The 4th and last cushion yet to be made is the smallest and easiest:


Who says you can’t paint an inflatable dinghy?

When we bought our boat, the RIB came with it, and we did very little to check it during the survey except to turn the outboard over and make sure it ran, but we obviously noted that the starboard tube was deflated. Every time we used the RIB we would fill that tube full of air, but a day or two later it would be deflated again. Clearly there was a leak.

Well, with the RIB out of the water for at least a few weeks, I decided to take advantage of the opportunity to find and fix the leak, and hopefully work on the cosmetic issues at the same time. I have a quote for new tubes at $4000, which isn’t a bad price for a re-tube, but I wanted to see if I could do any better.

The first step, so as to not disrupt Dr. D’s work too much, was to bring the existing tubes home to work on them.

That. Sucked.

Let’s not discuss that process any further. But, now that the tubes were off, and in my garage, I could begin the repair process. The first step was to remove the old, faded registration numbers and logos, which a heat gun and a spackle tool made quick work of:

Followed by a good scrubbing with soap and water:

And behold! A leak:

After letting the tubes dry overnight, I followed the rules that came with the hypalon patch material. The area around the leak was sanded with 60-grit sand paper, ad the first layer of glue was painted with a chip brush to both the patch and the tube, and allowed to dry for 90 minutes. Then, another coat of glue. Finally the patch was applied. The excess, leftover glue was painted around the edges, per advice on a forum. It wasn’t pretty, but the next day it held air.

At this point, despite the nay-sayers everywhere online, I had decided that I was going to attempt to paint the tubes to improve the look. I decided to start with West Marine liquid rubber. I chose it because, if I decided the liquid rubber was ugly, there was also the option to paint the tubes using West Marine top coating for inflatable tubes. Spoiler alert: the liquid rubber looked great, and we didn’t bother.

To prep for the liquid rubber, I wanted to seal all the nicks and scratches in the tube fabric. After researching for quite a while online, I decided that the easiest way was to simply spackle clear silicone over the holes:

After drying overnight, the next step was to prep the surface for painting (rubbering?). The tubes were fully inflated, and sanded with 60 grit paper until rough. Then the tubes were wiped down with Acetone to remove any oils or residue, and then wiped down with Xylene to prep for the liquid rubber. Remembering how difficult it was to take off, I didn’t want to paint the bolt rope, so masked it off. I also masked off the rub rail:

The instructions said to paint the liquid rubber on with a chip brush… in about 2 minutes I decided that was a horrible idea, and I switched to an epoxy compatible foam roller. The best technique I found was to paint the liquid rubber on thickly with the chip brush, and then follow up with the foam roller to spread it evenly.

Within a couple hours, I had the bottom half of the tubes painted. I found that the liquid rubber did a fantastic job self-leveling:

I let the tubes cure for 48 hours, flipped them, and did the other side the same way:

I’ll skip over how difficult it was to re-install the tubes a few days later as well. Even with copious amounts of dish soap and two people, that, too, sucked.

We will see how well the liquid rubber holds up over time, but the final product speaks for itself:

Ethanol Hell

Soon after taking possession of our boat, and delivering her to our home port, we wanted to get the RIB up and running.  Starting with the basics, I replaced the battery and filled the integrated fuel tank with fresh fuel. Sure enough, with those two updates, we were soon zooming around Commencement Bay, checking out potential fishing locations, timing how long it takes to get to certain places, and learning how she handles in different conditions.

One evening I took Tay and two of her friends out for a quick ride, showing off the seals and sea lions. Once clear of the marina, I throttled up, and we were soon on a plane, heading towards Brown’s Point.

And that’s when the trouble started.

The boat simply slowed down, and came off of plane. No bang. No smoke. Not much change in how the engine sounded. Just no power.

Not sure what had happened, I slowly motored everyone back to the dock to safety, and I spent a few minutes seeing if I could debug the issue. Later that weekend, after googling the symptoms, I was worried that maybe the “fresh fuel” that I put in caused the problem, since I simply filled a jug full of gas from a local gas station, which had at least 10% ethanol (I didn’t bother to look). But I am sure there was ethanol in the fuel, as EPA regulations make non-ethanol, or E0, gasoline extremely rare.

We share a dock with Doctor D, an outboard mechanic; we had already chatted about having the dinghy serviced since we had no documentation on how it was maintained, but now I also needed to have him diagnose my problem. In a few minutes he was able to determine that one of the three cylinders was not producing any power, and the suspect (later confirmed) was a clogged carburetor due to ethanol fuel.

Ethanol, I now know, is a serious problem for older outboard motors. I’m not going to pretend to be a mechanic, so I won’t go into details as to how or why, but BoatUS and other sources have some very good reading material to explain it if you care to understand. If not, suffice it to say, avoid ethanol-fuel like the plague on your outboard powered boat. There are websites available that map out where you can find pure gas in case you have a classic vehicle, or boat, that is incompatible with the new fuels.

Oh, but my anger with the EPA wasn’t over yet.

I still had 7 gallons of fresh, ethanol-blended fuel in my RIB’s tank. And I didn’t want to spend all the time, energy, and money fixing the problem, only to have it come back as soon as I started burning that gas. I needed to siphon it all out. After failing to get the siphon tube into the tank via the inlet, Dr. D let me borrow an attachment that allowed the fuel line from the engine to be used. After a few minutes I had a fuel tank full of E-10 fuel.

Modern cars can burn E10+ fuel just fine. You would think that putting the fuel I just siphoned out into a truck tank would be easy. But you would be wrong.

The new “clean air” nozzles, designed to prevent fuel vapors from leeching into the atmosphere, also don’t fit into the fuel port of a truck. I am not sure how long it takes to leech a few cups of gasoline into the atmosphere using the old-style gas cans, but I know exactly how long it takes to pour a few cups of liquid gasoline straight onto the ground using the new-style cans: about 4 seconds. Once again, Dr. D. came to the rescue, this time with a long funnel. We unscrewed the cap, and simply poured it into the tanks of our trucks.

I’m someone that likes clean air and water, so I want to support the EPA. I also want to keep this blog non-political. But this situation has really soured my opinion of the agency, and this meme (not mine) says it all:

To finish up this chapter, though, the dinghy is in Dr. D’s shop, and we will soon have her back in the water, this time filled with E0 gasoline.

Dinghy Project

Our new to us Bayliner 4788 came with an 11′ Rendova rigid inflatable boat (RIB) that is stored on the flybridge, out of the way of the main salon and cockpit.

We expect to primarily use the 4788 as a floating 2nd home, a dockside condo if you will, so most of our time aboard will be while we are tied up to our home dock. We’re very excited about the RIB, as it provides a quick, easy, and cheap way to get on the water for a couple hours and zip around the sound. In fact, even in the first few months of owning this boat, we’ve taken the dinghy out quite a few times.

There’s a davit crane on the flybridge that lifts the boat in and out of the water. We are still figuring out exactly the best way to put the RIB in and out of the water, but each time gets a little bit easier. The problem we run into is that we like to keep the big boat in the slip bow-in, so that the pilothouse has the great view of Commencement Bay, but that makes our home dock a port-side tie, and the crane is also on the port side. We either need to back the boat out of the slip half-way (our current preferred method), or push/lever the RIB past the finger pier (what we did the first few times, though that process won’t work if/when we have a neighbor boat in that slip).

And while we’ve been having fun playing on this little boat, as you can see, it does need a bit of cosmetic work and some upgrades.

There’s also another motive for this project: fishing.

For some odd reason, Megan doesn’t want me putting the new, expensive, big boat where the fish are…. near rocks, a few feet from shore, along the edge of a rip current, next to 30 other boats. Strange. So the RIB will be rigged as a fishing boat too, where we can zip out to the fishing grounds at 30kts, troll or drift for a few hours, and then run home when we get cold, tired, or otherwise finished fishing.

So this new series of posts will walk through the repair and upgrades we make to the SS TaylorTot, as we get ready for a summer of exploring, fishing, and micro-cruising aboard our RIB.


TV on board

I just spent over 4 months figuring out how to solve the problem of watching TV, and to a lesser extent providing high-speed internet aboard. I tried to get cable hooked up, but the line to the pedestal on the dock was broken and had no signal, and besides, it would only work when tied up at our home dock and not underway or at guest marinas. I looked into satellite tv, but it just didn’t solve my problem, specifically because of the internet service, but also because of the equipment costs for tv — it also had the same problem as cable when upderway.

My solution was to go cellular.

Where we boat we have almost 100% 4G LTE coverage.  I purchased a new line/SIM card for my phone plan, purchased a dedicated cellular modem, and added an old wi-fi router that I had laying around  I now have a solid, always-on, internet connection, with plenty of bandwidth to browse the web, stream movies and shows on Neflix or Amazon Prime Video, including 4K content.

When researching, I found the big problem with tv was live events, specifically sports. I want to spend the weekend on the boat, and in the afternoon watch a soccer, hockey, or football game, and I really had a difficult time figuring out how to make it happen. Our marina is tucked behind a hill, so we have very little over-the-air capabilities. To solve the TV issue, I subscribed to YoutubeTV, and a new 43″ TV with Roku built in. I also added a bluetooth transmitter, so the sound gets picked up and played through the 5.1 stereo.

YoutubeTV was my best option as it had the best sports coverage as well as unlimited DVR, but if you’re not a sports fan you may find better options with Hulu, Sling, Vue, or DirectTV Now

For $40/mo I have all the local broadcast channels (NBC/CBS/FOX/ABC) as well as traditional cable channels such as ESPN/2/U FoxSports/FS1/FS2, CNN/Fox/CNBC/BBC, etc. Compare channel lineups and other offerings between the providers and pick the one that serves your needs the best.

For the past month or so I’ve been enjoying all the Hockey, NCAA Basketball, and soccer that I can watch on my boat. Way more selection and at a better quality than my cable account at home which costs over 5x as much. So I’m now looking into drastically reducing my cable television plan, and using this same solution at home.

Farewell, Seahorse, And We Thank You

It’s official now. Officially official.

We have sold our 1983, 34′ Fu Hwa Seahorse, a Europa styled trawler.

Tom and Wendy made an offer that we accepted, and last weekend took ownership. With a little bit of work solving a persistent leak on the fore-deck, they will have a great little boat, that hopefully serves them as well as she served us.

The Fu Hwa Seahorse has a lot of positive traits, especially for Pacific Northwest cruising. She has high gunwales, covered side decks, a large flybridge, and a comfortable cockpit outside. Inside the salon with integrated seating, galley, and helm station is where we spend the vast majority of our time. Below the v-berth and head are great for a couple. Her single diesel engine would run for hours, economically pushing her along at 6kts all day long, simultaneously heating water and air for comfortable cruising.

We just out-grew her.

We wanted to spend more time aboard. The problem was that there was only one full-time berth on board, and with the three of us plus a dog, there just wasn’t a ton of indoor living space. So, while we would still come down a couple times a month, we rarely spent the night aboard.

IMG_20120826_191935
C:\[ESC]
Almost two years ago we decided it was time to upgrade. And this month we said goodbye to our Seahorse for good.


First Ever Tow

For the first time ever I had to be towed back to the dock.

It could have been worse. It could have been a dangerous situation requiring emergency services. We could have drifted into shallow water requiring us to take action to save the boat. It could have been windy. It could have been cold and rainy. We could have run out of ice.

As it was, it could have been better, but in the end it was a BoatUS membership tow back to the dock and a pretty memorable story.

An Afternoon of Fishing

* All photos taken by Jason Brandolini

With my wife and daughter out of town, I took the opportunity to take a friend out on the water after work to do some salmon fishing. As I started up the engine, I heard a high-pitched squeal. I assumed, at the time, it was just the belt slipping a little bit, and as soon as the engine got up to speed it went away.

On the way out to the Brown’s Point area, we motored through sailboats getting ready for some Wednesday night racing.

11800272_10153524100084096_4970863028190797517_n

It was a little windy, nothing to worry about, and we were soon trolling comfortably.

11822400_10153524100089096_8468589590104755762_n

As the evening approached, we were enjoying our time on the water snacking and drinking iced-teas. Legitimately, neither of us had a drop of alcohol all day, which served our needs well as the night unfolded.  As sunset approached, the wind died down, and it became one of those nearly perfect evenings on the water. We shut off the engine a couple hundred yards off shore, and mooched until sunset.

11755803_10153524100129096_5882859474478309579_n

An Evening of… Towing

As the sun just dropped behind the Olympic Mountain Range — at approximately 9:30 pm, a call came over the VHF radio of a small power boat drifting, dead in the water, between us and our home dock.

I asked Jason if he thought we should be good Samaritans. Since it was getting dark and we weren’t catching any fish anyway, he agreed that it was time to pull up the lines, head in, and help out a fellow boater. I answered the call on the VHF that we were an estimated 10 minutes away from the disabled vessel, and would be underway in approximately 5 minutes.

As Jason started reeling in a few hundred feet of line off both rigs, I turned over the engine, whereupon a horrible noise emanated from the engine room… It sounded like a chain got caught in the belt and was flopping around! I immediately shut off the engine, and went downstairs to investigate — everything appeared to be in order. I tried to turn over the engine again, and it made a more grating metal-on-metal sound. It was clearly not right, and mechanical — exactly like this:

There were now two disabled vessels adrift in Commencement Bay.

The good news for the small boat is that another, faster, closer boat decided to help them so they weren’t waiting for us. But after our call to BoatUS, we called the Coast Guard to let them know of the situation — two uninjured adults were aboard a vessel in no distress, simply waiting for Vessel Assist… and that was going to take a while.

To pass the time Jason decided to keep fishing, and in fact caught a few dogfish:

11800347_10153524100139096_168158708295130021_n

Vessel Assist gave a 90 minute estimated time of arrival and at around 10:45 the friendly red boat was seen coming towards us.

11828589_10153524100179096_433002765647934803_n

James was great. I felt bad that I had to drag him out on the water on a random Wednesday night, but like I said before it could have been worse. For everyone.

11800114_10153524100189096_6770795744014822875_n

Within a few minutes after filling out the paperwork the towing bridle was set up…

11825700_10153524100234096_3355114278362968609_n

And by 11:00 we were on our way home.

11811502_10153524100254096_253131167740623641_n

I sent the all-is-well text to my wife at 11:49pm once the boat was safely tied up in her slip.

Well, all-is-well as in everyone is back ashore safely — the boat still has an issue.

To Be Continued?

At this time I believe the issue to be the starter.

I don’t believe it’s anything internal to the engine, and I really hope it’s not. There was no smoke coming out the exhaust with the noise the first time we turned the engine over. And the only thing I could think of to check the internals was to check the oil — it was normal: Not black or milky, no particles when I rubbed it between my fingers, full amount, and it smelled just fine. Your standard brownish-black diesel oil.

After investigating and researching for the past 24 hours or so, the starter seems to make the most sense. The screetch at departure could be attributed to a starter, especially since the belt seems in good shape. The knocking has been reported when the starter pinion continues to make contact with the flywheel. And combined with the fact that I found a YouTube video (posted above) of a starter making the exact same noises, I think it’s a fair assessment.

But to be safe I’m actually going to hire a mobile mechanic to come out and take a look.

The Big Bash 2015

We went on our first boat trip of the year. We left our home dock on Friday, April 24th, and tied up to the docks at the Port of Poulsbo that afternoon. On Saturday I presented to the Cascadia sailors also in attendance, discussing Building your own Chartplotter with AIS, Radar, and followed up by listening in to presentations on sailing much further north than we have tried — all the way up to Alaska in most cases.  On Sunday, April 26th, we returned home, this time going around the east side of Vashon Island to avoid the currents, tying up at home in the mid-afternoon hours.

The map below shows the path as captured by our GPS location on our OpenCPN chartplotter with the purple track being the north-bound trip, and the yellow track being the south-bound return trip. There are a few gaps where I rebooted the machine for some reason or another, but it still shows the path we took quite well. I just extracted the route from OpenCPN, and used gpsvisualizer.com to generate KML files from them. Then I logged into Google Maps, and imported the KML files into a custom public map.

Preparation

Prior to the trip there was a ton of work to do.

Last summer we had a bit of an electrical issue on board, and lost our alternator and house bank of batteries. While we had replaced all the batteries, and purchased and mounted a new alternator, it wasn’t hooked up properly. I couldn’t figure it out as the wiring did not match up to any of the diagrams on the instructions that came with it. So before we went on this trip, I wanted to have a professional marine electrician finish up the installation.

I improvised a charging solution so that the engine wouldn’t die on the way, and drove the boat over to ModuTech Marine. At first even the electrician was confused as to what the instructions were showing. But he then discovered the issue: The instructions were showing three completely different options for installing the alternator. They just didn’t actually state that they were options, so I was trying to do all three at once! Less than an hour later we were done, and spent a couple hours cruising around Commencement Bay, validating that the batteries were, in fact, being charged properly.

Mechanically the boat was ready to go. Since this was the first time the boat had been running for any considerable time since last August, it was nice to just be out on the water.
20150420_125712

I also had to prepare for the presentation I was giving. I have been working on running OpenCPN on these low-powered systems such as the Raspberry Pi and CubieTruck for quite some time, but because these are active projects and platforms things change. Taking the opportunity, I started over from scratch, building the chartplotter on a Raspberry Pi 2, the most recent device. Over a couple days’ span, I had built a new system, running the most recent version of OpenCPN (4.1.412), with GPS location.

I also had an AIS receiver module that I planned on hooking up while we were underway and within range of signals. I also threw together a Powerpoint slide deck for the presentation, plus a bunch of other examples of hardware. The presentation was ready as well!

The Trip North

The trip north started out under overcast skies. We got a bit of a later start than originally planned, but did get some extra water in the tanks, and we were still well within the timeframe to catch the ebb current to assist our way north. We cruised through Colvos Passage at nearly 8 kts over ground, 6 through the water, with a substantial front to the south following us all the way.

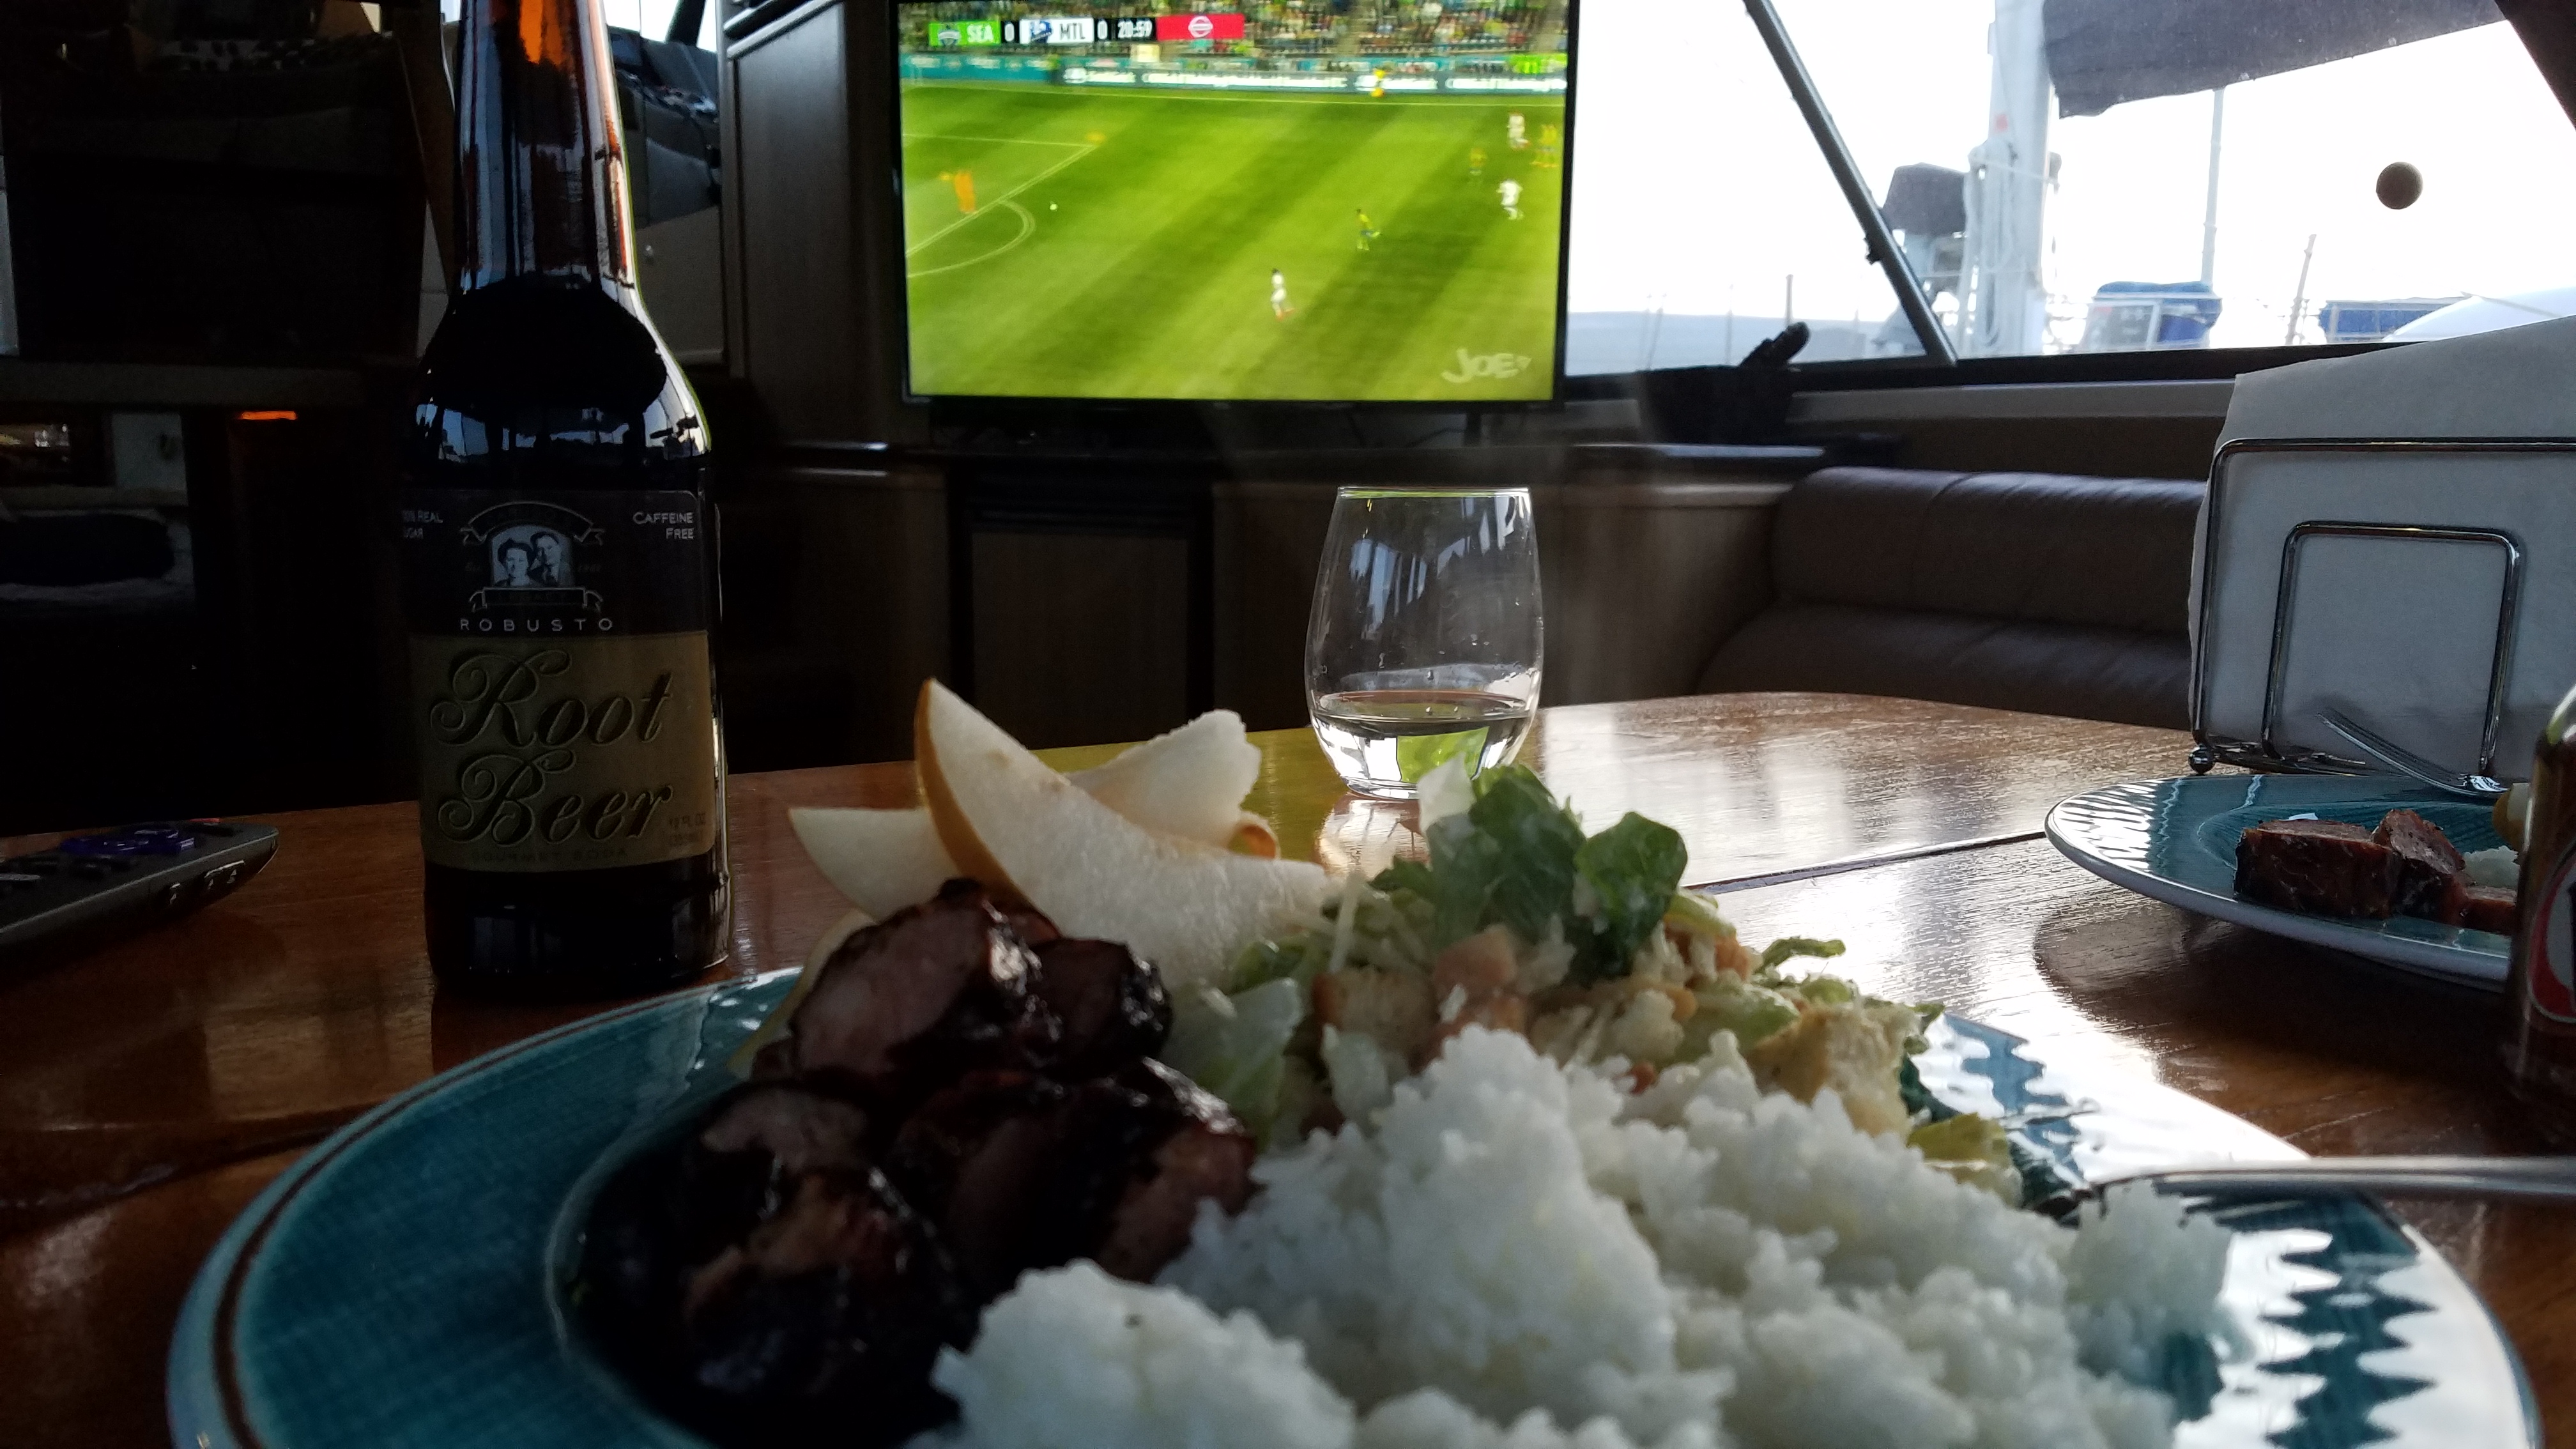
The conditions were nice enough, though, that I was able to have a few hours to play with the AIS module, and caught our first ever AIS contact just as we were coming out of Colvos. It was a ferry leaving the Southworth Docks, and it showed up great! I wasn’t sure how to take a screenshot, so I simply took a picture with my phone:
First AIS Contact

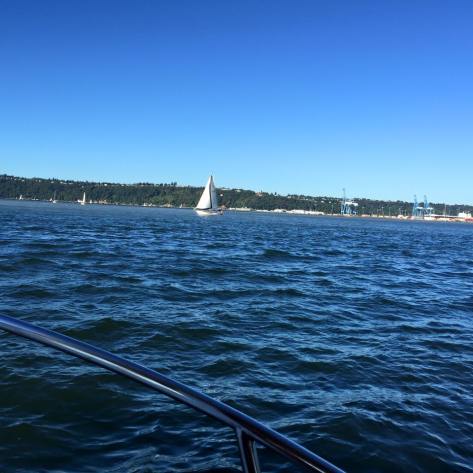
Once we got to the north end of Blake Island, that front that was chasing us caught up. 2-3′ chop built up, and the ride got quite bumpy, right as we were entering into Rich Passage. Of course the Bremerton Ferry heading in at the same time didn’t do anything to reduce the stress of the situation. But once we rounded the southwest corner of Bainbridge island and turned more north, the wind pushed us straight into Liberty Bay. It was still windy and bumpy, but much better. The boat handles these conditions well enough that everyone was able to at least get a small rest in:
20150424_122447

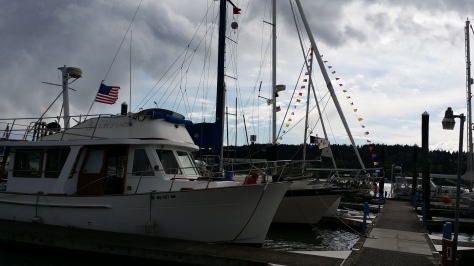
An hour or so later we were docking at Poulsbo. I didn’t have the bow thruster working (did I mention we have had some electrical issues?) so it was a matter of lining the boat up on the dock and letting the wind push us in. We docked the boat as if we’d been doing it every weekend all year long! With the boat safely tied up to the docks, with shore-power and water, we were able to turn on a few movies and assist the rest of the Cascadian sailors as they arrived. Soon appetizers were shared and everyone was having a good time on each other’s boats.

20150424_161231

Poulsbo

The next morning we woke up to fog and glassy conditions.

20150425_07070420150425_07065020150425_074213

There is a ton to do for everyone in Poulsbo. The bakery is great. The bookstores are great. There are great restaurants. There’s even a great little aquarium with free (donations) admission. In short, it’s a great destination.

My AIS presentation went well, I think. It’s difficult to find that right balance between technical and non-technical aspects in a presentation like this. Some of the geeky sailors wanted to know things like what kind of interface do the chips communicate on between the modules, while other sailors just picked up the Raspberry Pi and said “well that’s kinda cool” before putting it down. But in the end, I had lots of people that seemed legitimately interested, and very few people walked out of the room. Well, except my wife of course.

I also wanted to listen to the other presentations, and was able to catch the vast majority of all of them. We definitely need to do more cruising on our boat, even if it’s just short weekend trips. But to hear about the multiple-months-long trips that these sailors went on, and see some of the thousands of pictures they took was amazing. The room was mostly full the entire day.

20150425_202319

Gramma and Papa took Tay and the dog home in the afternoon so that neither of them would be bored just sitting around. That night, with the boat to ourselves, we decided to watch the first episode of this season of Game of Thrones. About 20 minutes into the show, our electric heater went out. For those that have boats, you probably already know that electric heaters very often trip the breaker switch, and I assumed that was the situation here. Except when I looked at the switch panel, the breaker was fine. And the same was true with the breaker on the dock. For giggles I tried to turn over the engine, just to see… It barely made a sound.  Uh-oh.

So at 11:00pm, I dug into the engine room with a headlamp. I grabbed my electrical meter, and stuck the probes on the first house bank — 13.7 volts. Then I tested each of the other house bank batteries, and all of them were fully charged. I tested the starter battery, though, and it registered only 9.8 volts — essentially dead!

We weren’t stuck because with the fully charged house bank I knew I could get the engine turned over if I wired the engine starter to it. It’s not the most efficient way to do it, but once would work just fine. But I needed to figure out why we ran down our starter battery while plugged in to shore power. As I’m tracing wires and trying to figure it out, I lift up one of the house bank batteries to see behind it… and a large cable falls away loose. It was stuck between the battery and the battery case, and I couldn’t see it. It was also about 8AWG, so substantially large. I reconnected it to the negative bus, and realized that it was the return line from the starter battery charge circuit — the starter wasn’t charging at all.

I believe that because our 1-2-All switch was set to all, we were running down both banks all weekend, and only the house bank was being replenished. After letting the starter battery charge overnight, the next morning I tested the engine and she turned over without hesitation. We were good to go again.

The Return Trip

Most of the boats were starting to leave around 10:00. After a couple cups of coffee, and failing to give away the last of our mini cinnamon rolls, we decided to follow suit. Running the Raspberry Pi Chartplotter (because why not?), we backed out of the slip we had rented, into a very wide fairway, spun the boat, and headed back south.

The return trip was, for the most part, uneventful. We saw more ferries coming through Rich Passage, and again had to deal with ferries leaving the Vashon Island docks that confused us (we thought they were going to head east, so moved out of the way of that direction, but instead the ferry turned 90 degrees and headed north, more towards us than away!), but there was nothing truly concerning.
20150426_112546
The boat ran well the whole time, showing charging voltages on both battery banks, and we even took a short detour just north of Brown’s Point Lighthouse when we saw a small pod of Dall’s Porpoises off to our starboard.

Just four short hours after leaving the docks in Poulsbo, we were docking in our slip. Of course we did an absolutely terrible job on that docking maneuver! But at least there was nobody there to watch it happen, so nobody knows.

Right?

Lots of traffic to this little blog

Originally, I built this blog for myself. I wanted to use it to track maintenance and projects on our boat and to share trip reports and stories with friends and family; basically a captain’s log online.

But in the past few months, the traffic to this blog has dramatically increased, due to my OpenCPN Chartplotter project. It has been linked to in other forums, by other people that have found it in searches. It has been interesting to see.

I’ve also answered a few emails and forum posts from people that would like me to build one for them — either because they don’t have the time, or that have no interest in the electronics/software DIY aspect of the project.

Since I have a bit of an independent/entrepreneurial streak in me, this has had me thinking for some time that it might be interesting to create a device that takes all the leg-work out of creating a chart-plotter using standard components and OpenCPN. Everything, both hardware and software, that I’ve used so far has been Open Source, which allows commercial application and use. I’m not looking to quit my day job and be a chart-plotter vendor — Garmin, Lowrance, and Raymarine are already well established.

The idea is simply that the baseline system could be provided in an out-of-the-box solution. A low-powered device that can display GPS-located charts on a 7 or 10″ sunlight readable display by simply providing 12v power. Is this something that more people would be interested in?

Exterior woodwork

The cetol and varnish on our cap rail had seen better days. Due to a few weekends in a row of exceptionally sunny weather, we decided to tackle this project.

The first step was to strip the old varnish and/or cetol that was previously applied. We didn’t know what it was, but a heat-gun was able to soften it, and a scraper was able to lift it off:

20140824_141123

With two people, one person holding the heat gun and another scraping, one side of the cap rail could be stripped in about two hours. Another 30 minutes of sanding, and the rail was clear. You can see that the previous application was done fairly sloppily, as there were drips and bleeds:
20140824_125445

A few minutes with the shopvac cleared the side decks:

20140824_125425

We use Cetol natural. We truly don’t mind the look, but the ease of application is really why we use it:

20140824_150645

But to really make it look nice, you need a couple coats of Cetol clear over the top. You don’t need to sand between coats, and it gives a glossy “wet” look, and continues to protect the wood:

20141005_122005

20141005_122032

The Journey's The Thing