When we bought our boat, the RIB came with it, and we did very little to check it during the survey except to turn the outboard over and make sure it ran, but we obviously noted that the starboard tube was deflated. Every time we used the RIB we would fill that tube full of air, but a day or two later it would be deflated again. Clearly there was a leak.
Well, with the RIB out of the water for at least a few weeks, I decided to take advantage of the opportunity to find and fix the leak, and hopefully work on the cosmetic issues at the same time. I have a quote for new tubes at $4000, which isn’t a bad price for a re-tube, but I wanted to see if I could do any better.
The first step, so as to not disrupt Dr. D’s work too much, was to bring the existing tubes home to work on them.
That. Sucked.
Let’s not discuss that process any further. But, now that the tubes were off, and in my garage, I could begin the repair process. The first step was to remove the old, faded registration numbers and logos, which a heat gun and a spackle tool made quick work of:
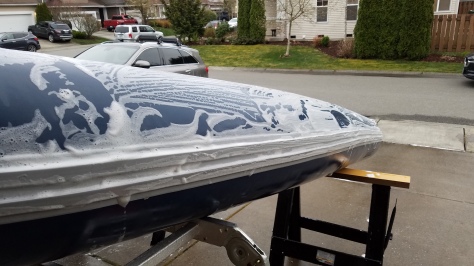
Followed by a good scrubbing with soap and water:
And behold! A leak:
After letting the tubes dry overnight, I followed the rules that came with the hypalon patch material. The area around the leak was sanded with 60-grit sand paper, ad the first layer of glue was painted with a chip brush to both the patch and the tube, and allowed to dry for 90 minutes. Then, another coat of glue. Finally the patch was applied. The excess, leftover glue was painted around the edges, per advice on a forum. It wasn’t pretty, but the next day it held air.
At this point, despite the nay-sayers everywhere online, I had decided that I was going to attempt to paint the tubes to improve the look. I decided to start with West Marine liquid rubber. I chose it because, if I decided the liquid rubber was ugly, there was also the option to paint the tubes using West Marine top coating for inflatable tubes. Spoiler alert: the liquid rubber looked great, and we didn’t bother.
To prep for the liquid rubber, I wanted to seal all the nicks and scratches in the tube fabric. After researching for quite a while online, I decided that the easiest way was to simply spackle clear silicone over the holes:
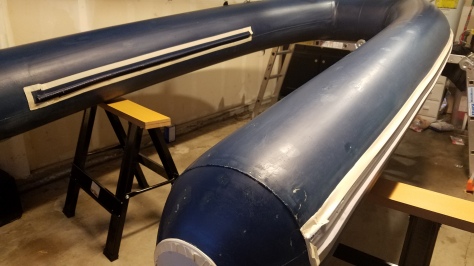
After drying overnight, the next step was to prep the surface for painting (rubbering?). The tubes were fully inflated, and sanded with 60 grit paper until rough. Then the tubes were wiped down with Acetone to remove any oils or residue, and then wiped down with Xylene to prep for the liquid rubber. Remembering how difficult it was to take off, I didn’t want to paint the bolt rope, so masked it off. I also masked off the rub rail:
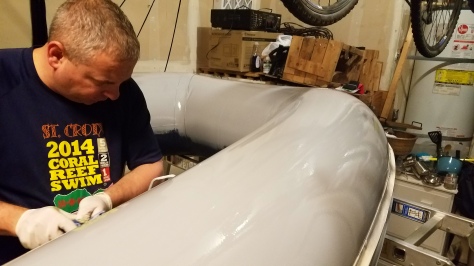
The instructions said to paint the liquid rubber on with a chip brush… in about 2 minutes I decided that was a horrible idea, and I switched to an epoxy compatible foam roller. The best technique I found was to paint the liquid rubber on thickly with the chip brush, and then follow up with the foam roller to spread it evenly.
Within a couple hours, I had the bottom half of the tubes painted. I found that the liquid rubber did a fantastic job self-leveling:
I let the tubes cure for 48 hours, flipped them, and did the other side the same way:
I’ll skip over how difficult it was to re-install the tubes a few days later as well. Even with copious amounts of dish soap and two people, that, too, sucked.
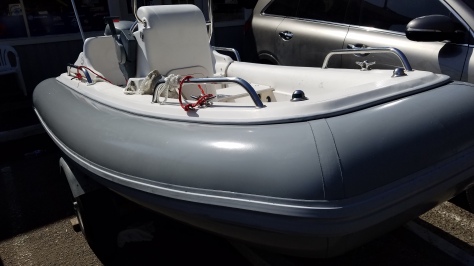
We will see how well the liquid rubber holds up over time, but the final product speaks for itself:
![m/v C:\[ESC]](https://mvcesc.files.wordpress.com/2018/05/cropped-headerbw.png)


My dinghy is in the same shape. I HAVE to know how you got the tubes off and back on.
Unscrew all the set-screws along the rope slide-rail. Then spray the entire length with soap and water. Finally, you “simply” pull the tubes off the hull along the slide rail.
It took me almost an hour per side, and not much less to put it back on.